The Facebook timeline tagging feature is undoubtedly a useful tool for sharing and connecting with friends. It allows people to tag you in photos, videos, and posts, making it easy to share memorable moments. However, there are instances when this feature can become a bit overwhelming, as friends may tag you in inappropriate images or videos, and these end up being displayed on your timeline. Fortunately, Facebook provides the option to control and customize your timeline tagging settings, giving you the power to prevent tagging and manage what appears on your profile. In this comprehensive guide, we’ll walk through the steps to prevent tagging on Facebook, ensuring that you have control over the content that shows up on your timeline.
Step 1: Log In to Your Facebook Account
Open your preferred web browser and log in to your Facebook account. Make sure you enter your credentials accurately to access your account successfully.

Step 2: Navigate to Settings and Privacy
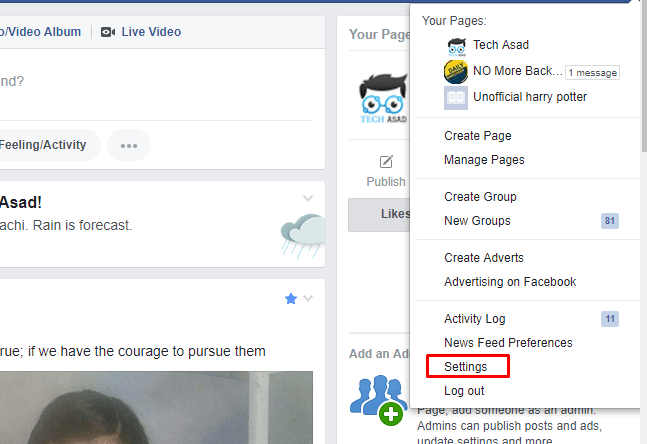
Once logged in, locate the drop-down arrow in the top right corner of the Facebook page. Click on it to reveal a menu, and then select “Settings & Privacy.” This will open a submenu where you can access various settings.
Step 3: Go to Settings
From the “Settings & Privacy” submenu, click on “Settings.” This will take you to the main settings page where you can customize various aspects of your Facebook account.
Step 4: Access Timeline and Tagging Settings
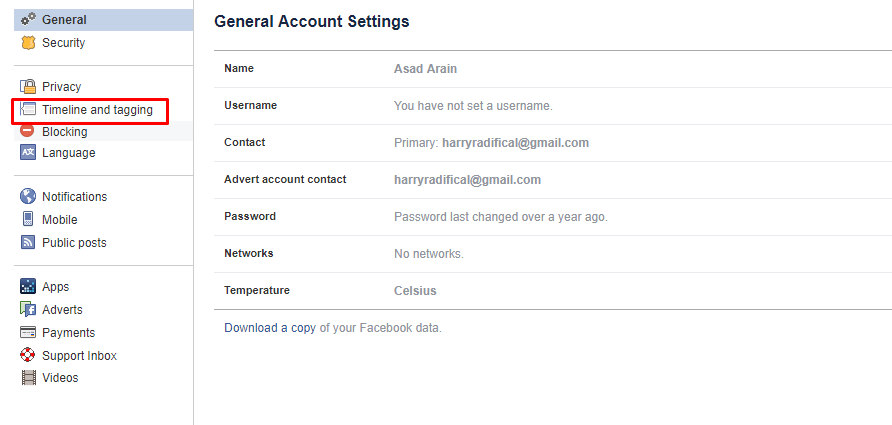
On the left side of the settings page, you will find a menu. Look for and click on the “Timeline and Tagging” option. This section allows you to control who can post on your timeline and who can tag you in posts.
Step 5: Configure Tagging Settings
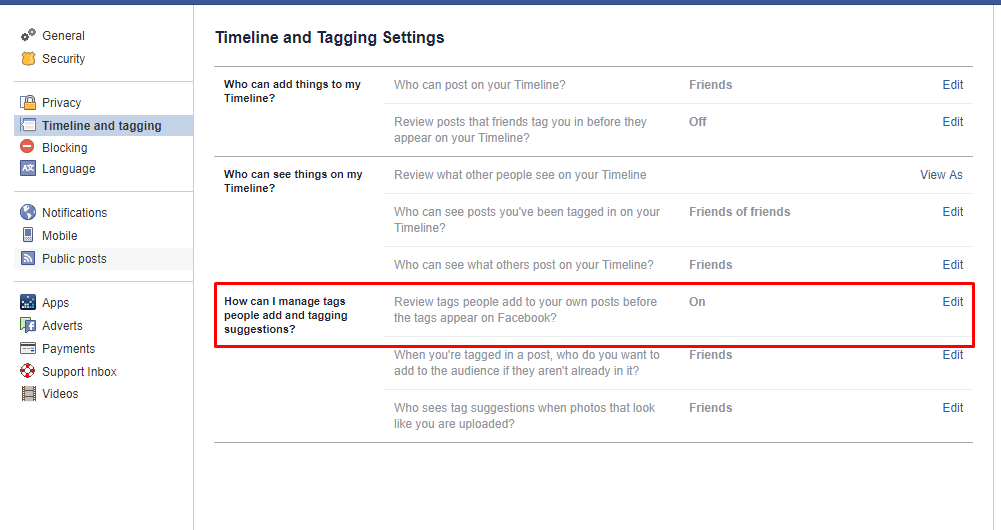
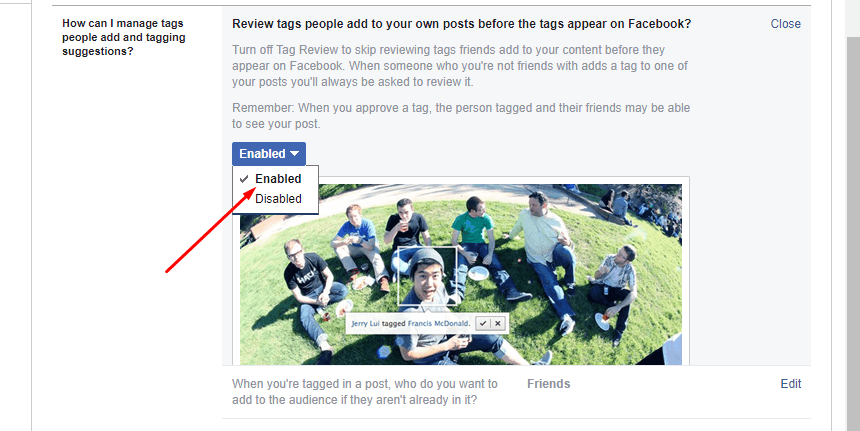
Under the “Timeline and Tagging” section, you will find several options related to tagging. The key option to focus on is “Review tags people add to your posts before the tags appear on Facebook?” Enable this feature by clicking on it.
Step 6: Save Changes
Once you’ve enabled the tag review feature, scroll to the bottom of the page and click on the “Save Changes” button. This ensures that your chosen settings are applied.
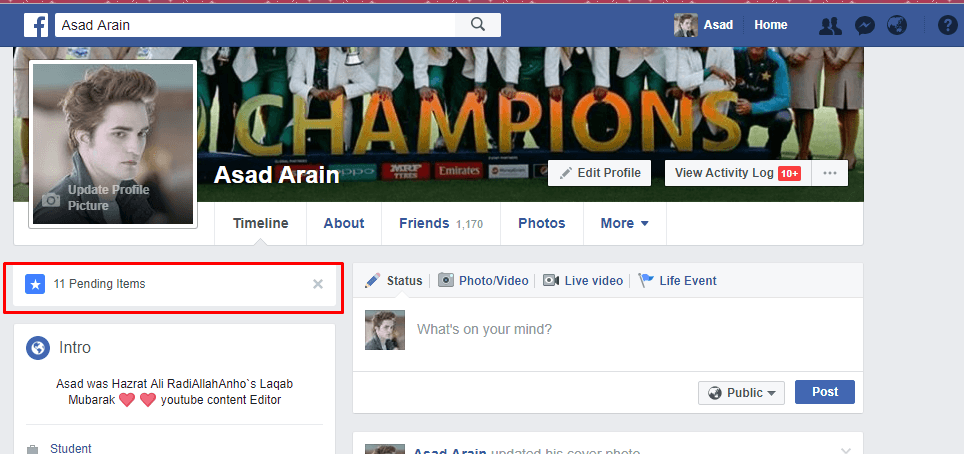
Step 7: Manage Pending Tags on Your Timeline
Now, whenever someone tags you in a post, photo, or video, it won’t immediately appear on your timeline. Instead, it will be sent to a “Pending” section for your review. To manage these pending tags, go to your Facebook profile and locate the “Activity Log” button. Click on it to access a chronological list of your activity on Facebook.
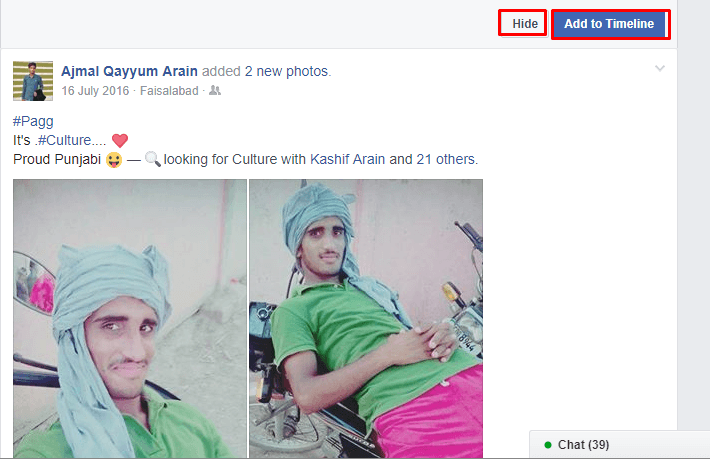
Step 8: Approve or Reject Tags
In the “Activity Log,” find the “Timeline Review” section, which contains tags awaiting your approval. Here, you can review each tag individually. If you want the tagged content to appear on your timeline, click “Add to Timeline.” If you prefer to keep it hidden, click “Hide.”
By following these steps, you’ve successfully set up a system where you have control over what gets tagged and displayed on your Facebook timeline. This not only helps prevent unwanted content from showing up but also allows you to curate a more personalized and intentional online presence.
Conclusion
The Facebook timeline tagging feature is a double-edged sword – while it facilitates sharing, it can also lead to an influx of content on your timeline. Taking control of your tagging settings allows you to strike a balance, ensuring that your online presence aligns with your preferences. By enabling tag review and managing pending tags, you regain authority over what appears on your timeline, promoting a more enjoyable and tailored Facebook experience.